Personal Musing On Monochrome Digital Cameras
I was thinking of exploring the world of black-and-white digital photography so I started looking into the available options. Currently, only the Leica Monochrom and the Pentax K-3 III Monochrom are still the only native monochrome digital cameras availble, targeting photographers interested in maximising the potential for ‘true’ black-and-white photography compared to converted colour images.
Many experts in the field justify the existence of this particular camera by citing the same manufacturers’ marketing claims, such as better overall image quality and the superior performance of a custom-built sensor. However, I am a photographer, not an electronics engineer or software programmer, so I care more about the final results than the technicalities. This is why I have converted a few colour photos taken over the years with different cameras and lenses to black and white, to see if the results are actually so inferior as to justify the use of a dedicated camera.
1 – A few examples
The featured image was taken with a Canon 5D Mark II and an EF 24-105 f/4 lens, which is an excellent all-rounder.

This was taken with a Pentax K-1 and a Pentax FA 80-200 F/2,8. You may see the original in this post previously published by 35mm.com.

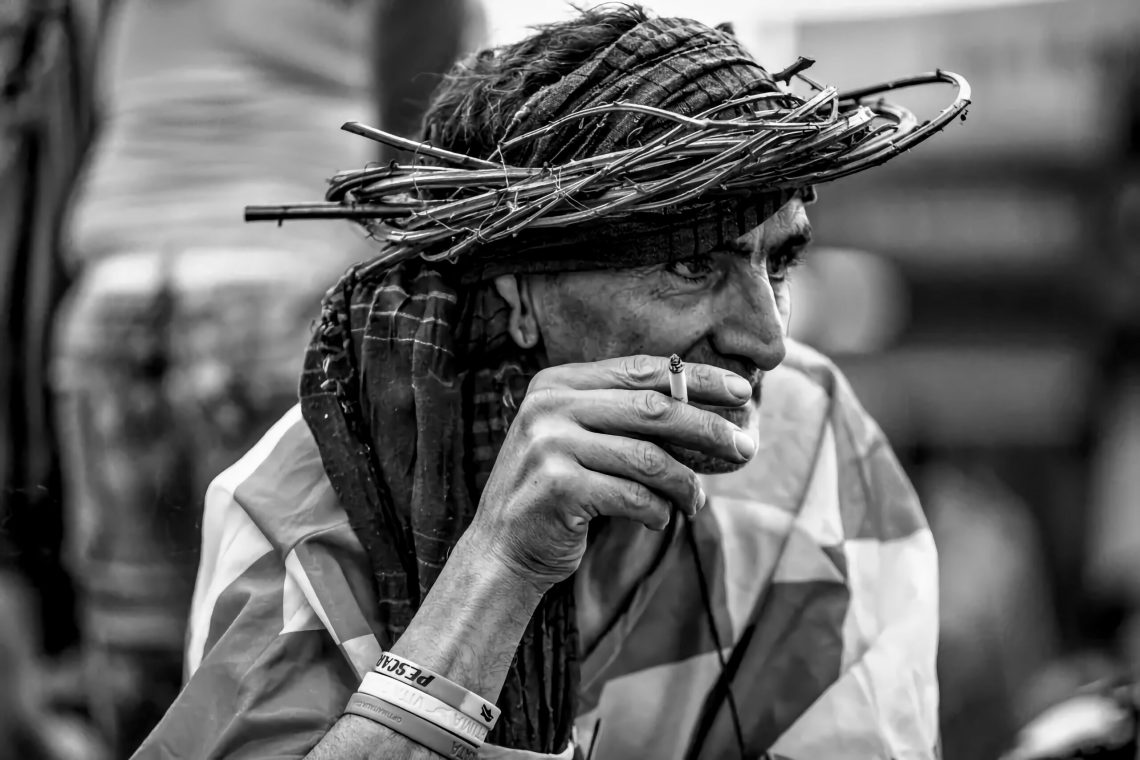
Back to the Canon 5D Mark II, this time with a Canon EF 100-400 F/4,5-5,6. This is a portrait of a Flamenco bailaor taken in a concert of Livio Gianola, the supremo of 8-strings classical guitar.

while this one was shot during an MMA fight.

This one was taken with a Fuji X-T4 and a Fujinon XF 18-120 F/4 during a handball match between Italy and Belgium.

and this one, portraying Jazz guitarist Rocco Zifarelli (then playing with Gabriela Sinagra, Danny Gottlieb and Jeff Berlin) was taken with a Leica M9 and a Leica Elmarit 90 F/2,8

2 – The Conversion Process
The conversion was made with Pixelmator Pro, following these steps (the values are a starting point, and must be adapted to the specific photo):
1 – Before the conversion
In the Selective Colours tab I left the Hue unchanged, and tweaked Saturation and Brightness as follows:
- R -10, -15
- O +5, +10
- Y -10, -15
- G -10, -20
- C -20, -25
- B -25, -25
- V -15, -15
- M -10, -10
2 – Black and White Adjustment
In the Black & White tab, set:
- R 65%
- G 45%
- B 25%
- T 10%
- I 100%
3 – Curves
Pixelmator Pro doesn’t allow to insert specific In-Out values by hand so working the curves with the mouse maybe challenging. That said, handle the RGB curve so to tame the highlits and smooth the shadows transition.
4 – Sharpen
- Radius 0,6
- Amount 45%
5 – Vignette
Adjusting the Vignette option can help to separate the foreground from the background if the former has brighter tones.
6 – Other tweaks
Finally, try setting the global saturation to zero and adjusting the exposure, highlights, shadows, contrast, black point, texture and clarity as appropriate.
3 – Conclusions
Post-processing photographs taken with various cameras and lenses in different conditions properly allows for consistent results. The black-and-white versions of properly taken colour photographs are of excellent quality. Therefore, but this is just me, there is no point in purchasing a dedicated camera.
For the sake of clarity, the issue is not cost, but effectiveness. If a tool is necessary for work, there are no questions — it must be purchased. However, if this tool does not add a significant value to the existing setup, then it is not necessary to purchase it.